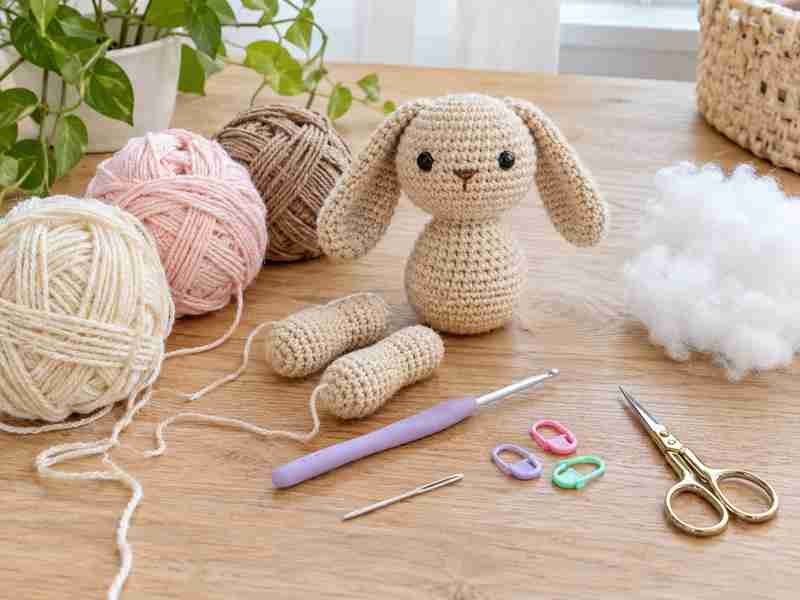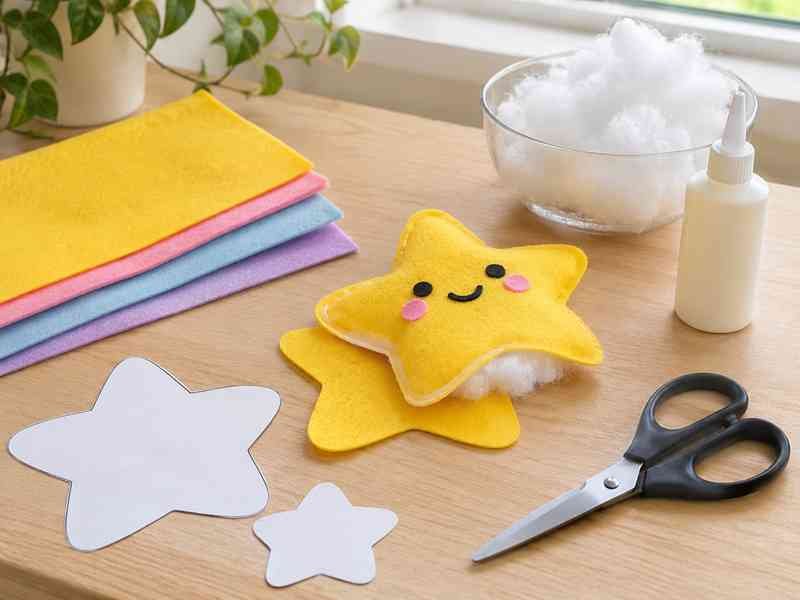
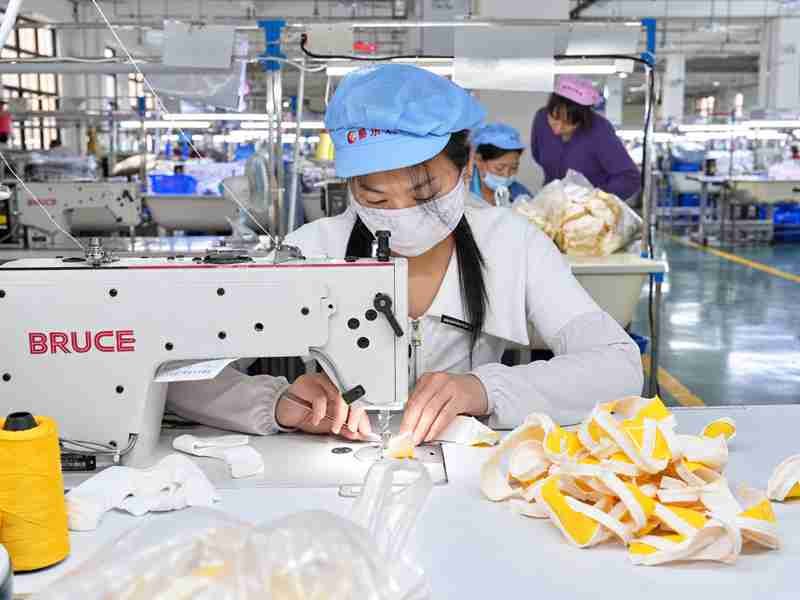
Making a stuffed animal with a sewing machine looks easy until two flat pieces of fabric have to become a balanced three-dimensional character. A few millimetres of seam variation can make one cheek fuller than the other, a slightly different pile direction can change how one side reflects light, and extra stuffing can turn a soft face into a hard, distorted shape. The machine does the stitching, but the quality of the finished plush comes from how well pattern, fabric, cutting, sewing, filling, and finishing work together. That is why a simple first project can teach more about plush construction than many people expect: every curve, notch, seam, and handful of fibre affects the result you see when the toy is finally turned right side out.
To make a stuffed animal with a sewing machine, start with a simple pattern and stable fabric, cut mirrored pieces accurately, sew with a consistent seam allowance, slow down around curves, clip the seam allowance where needed, turn the shell carefully, add stuffing gradually, shape the body as you fill it, and close the opening with a concealed hand stitch. Test each fabric and stitch setup before sewing the final pieces.
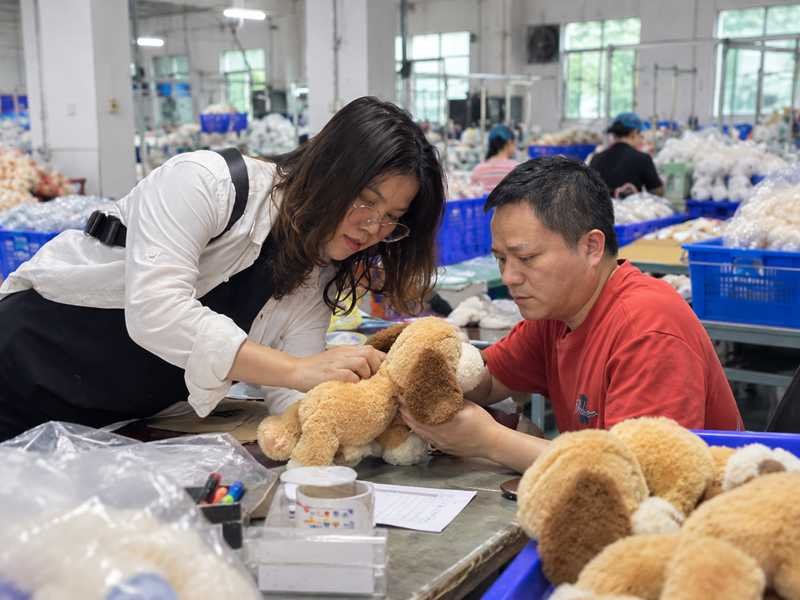
The same basic sequence also explains why commercial plush development is more than high-speed sewing. A one-off handmade toy can be adjusted by eye as you work, but a product that must be reproduced repeatedly needs clearer pattern versions, material specifications, filling references, approved samples, and quality checkpoints. Ewin Toys approaches custom plush development through that broader chain, linking artwork and pattern engineering with prototype sewing, stuffing, finishing, quality review, and scalable production. If you follow the process below carefully, you will not only finish a cleaner stuffed animal; you will also understand what makes a plush design easier to reproduce, strengthen, troubleshoot, and eventually scale.
What Do You Need Before Sewing?
Before sewing a stuffed animal, prepare the pattern, fabric, matching thread, a suitable machine needle, polyester filling, cutting tools, marking tools, clips or pins, and a hand-sewing needle. More importantly, test the fabric before cutting the final pieces. Fabric stretch, pile direction, stitch tension, and filling behaviour can change the finished shape even when the same pattern is used.
Practical setup ranges for a first machine-sewn stuffed animal. Always test the actual fabric and pattern before treating these values as final settings.
| Item | Practical Starting Point | What to Check |
| Seam allowance | 6-10 mm | Keep it consistent around curves; use the pattern specification when provided. |
| Straight stitch length | 2.0-2.8 mm | Test seam density, fabric stretch, puckering, and seam opening. |
| General needle size | 80/12-90/14 for many medium fabrics | Adjust for knit structure, fabric thickness, backing, and stacked layers. |
| Turning opening | About 50-100 mm for a medium plush | Use a wider opening for bulky fabric or large head/body sections. |
| Test seam | 100-150 mm | Check tension, skipped stitches, layer creep, and behaviour under light stuffing pressure. |
| Filling method | Small, loosened amounts | Fill extremities first and compare both sides as the shape develops. |
Choose Fabric for Shape, Not Just Softness
The first fabric decision should be based on how well the material supports the intended shape, not only how soft it feels in your hand. Beginners often choose the plushest fabric available and then discover that it stretches under the presser foot, slides between layers, hides pattern marks, or changes size after stuffing. For a first project, fleece, stable short-pile plush, or a medium-weight woven fabric is usually easier to control than very stretchy minky or long-pile faux fur. Once you understand how your pattern behaves, softer and more difficult fabrics become much easier to use because you already know which changes come from the material and which come from your sewing.
Minky, velboa, and other commercial-style plush fabrics can create a softer surface, but they introduce extra variables. Pile direction changes how light reflects across the body, stretch can make the head wider than the paper pattern suggests, and long pile can become trapped in the seam. Before cutting the actual animal, sew two small test rectangles, turn the seam, pull gently across it, and place a little stuffing behind it. This simple test tells you far more than looking at a flat seam because internal pressure reveals puckering, weak stitches, and excessive stretch before those problems are built into the finished toy.
Match Needle, Thread, and Settings
A sewing-machine needle should match the fabric construction and the number of layers you expect to sew. A universal needle often works on stable woven materials, while knitted plush may sew more cleanly with a ballpoint or stretch-oriented needle. Medium fabrics are commonly tested around size 80/12 to 90/14, but this is only a starting point; thick seams, multiple inserted parts, or dense backing materials may need a stronger setup. Use good-quality polyester sewing thread for most projects and check both sides of the test seam. The upper and lower threads should lock cleanly within the fabric instead of forming loose loops on one surface or pulling the material into a ridge.
Do not respond to every sewing problem by increasing thread tension. If one layer becomes longer than the other, the real issue may be fabric creep rather than tension. If stitches skip, the needle may be bent, too fine, or poorly matched to the fabric. If the seam looks uneven on pile fabric, the stitching may actually be correct while fibres are trapped inside the seam. Change one variable at a time, sew another test, and compare the result. This method takes a few minutes but prevents the common habit of making several adjustments at once and then not knowing which change actually fixed the problem.
Prepare Filling and Basic Tools
Polyester fibre filling is practical for many stuffed animals because it is lightweight, springy, and easy to distribute into irregular shapes. The more important question is how the filling is placed. Narrow legs should be filled in small additions so fibre reaches the ends instead of forming a hard plug near the opening. A seated character may need firmer support around the lower body, while a floppy comfort plush may intentionally remain softer. Keep a blunt turning tool, sharp fabric scissors, removable fabric marker, clips or pins, and a hand-sewing needle within reach. These simple tools help you place components, preserve curves, reach small areas, and close the final opening without damaging the fabric.
A useful rule is to choose tools that reduce variation rather than simply increase speed. A clear notch makes two pieces easier to match. A sharp cutter preserves the intended curve. A removable mark keeps the eye position from becoming a guess. A blunt turning tool reaches an ear tip without puncturing the seam. In commercial plush development, the same thinking becomes more formal: materials, components, and filling are described with repeatable fields rather than vague terms such as ‘soft fabric’ or ‘medium fill.’ For a handmade project, you do not need a production BOM, but you can still benefit from the same habit of defining what you are using and checking it before the final assembly begins.
How Do You Prepare the Pattern?
Prepare the pattern by checking scale, identifying mirrored pieces, confirming whether seam allowance is included, marking registration points and turning openings, and placing every piece according to the fabric’s grain, stretch, and pile direction. A stuffed-animal pattern controls three-dimensional volume, so inaccurate cutting or inconsistent placement can change the final proportions before sewing even begins.
Understand How Flat Pieces Create Volume
A stuffed-animal pattern is not simply the outside outline of an animal. It is a map that tells flat fabric where to create three-dimensional volume. Two curved side panels can form a basic body, a gusset can add width to a head or belly, a dart can create extra roundness, and a separate muzzle can push the face forward. This is why tracing a front-view drawing rarely creates a convincing plush pattern by itself. The illustration may show head width but not depth, or large cheeks without explaining where the extra fabric volume should come from. Pattern pieces answer those missing spatial questions by dividing the character into surfaces that can be sewn and filled.
For a first project, a lower piece count usually makes the relationship between pattern and shape easier to understand. A design with roughly four to ten main fabric pieces is generally easier to assemble than a character with separate facial panels, head gussets, paw pads, clothing, hair, and multiple accessories. For an original commercial character, however, pattern engineering becomes much more deliberate because the pattern must preserve the look of the artwork while still being practical to cut, sew, stuff, and repeat. This is the point where visual design and manufacturing begin to overlap: a beautiful silhouette is only useful if the seams, volume, and assembly sequence can reliably recreate it.
Control Seam Allowance and Registration
Consistent seam allowance is one of the simplest ways to improve stuffed-animal accuracy. If a head is designed for an 8 mm seam allowance but one side is sewn at 5 mm and the other at 10 mm, the two finished halves are effectively different sizes. The fabric may still join, yet stuffing will push the difference outward and make the asymmetry more visible. On difficult curves, marking the actual sewing line can be more reliable than watching only the raw edge. Transfer notches, centre points, limb positions, ear bases, and the limits of the turning opening before the pieces are separated, because those marks become your map when the fabric no longer looks like the original paper pattern.
Registration marks are especially important when several curved pieces meet. A head gusset may have a front centre, top centre, and back centre that need to align with matching points on the side panels. If one section gradually feeds ahead of another, the seam may close but the face can twist. Avoid deep notches that weaken a narrow seam allowance; a shallow snip or washable mark is normally enough. When a prototype repeatedly needs someone to ‘eyeball’ the position of an ear or arm, that is a sign that the pattern information is not doing enough work. Better registration reduces dependence on memory and makes both handmade and repeat production more predictable.
Respect Grain, Stretch, and Pile
Pattern placement changes the way the finished animal behaves. Woven fabric has a grain direction, knitted plush often stretches more in one direction, and pile fabrics have a nap that affects both appearance and hand feel. Before cutting, stroke the fabric in both directions and decide how the pile should run over the final character. Mirrored face pieces should normally share a consistent nap direction so one cheek does not look darker than the other under the same light. Likewise, if one body panel stretches horizontally while its mirror stretches vertically, the shell can distort even when the paper pieces were identical.
Material direction also affects cutting efficiency and repeatability. When the pile is long, you may need more space between pattern pieces to preserve direction and avoid visible reversal. With stretchy materials, careless layout can create panels that expand differently during stuffing. In controlled production, cutting therefore pays attention not only to the outline but also to nap, elasticity, colour lot, layout, and the released pattern version. The home-sewing lesson is the same in simpler form: do not treat the fabric as a neutral sheet. It has direction, stretch, surface behaviour, and visual properties that should be decided before the first cut is made.
How Do You Sew the Plush?

Sew the plush with right sides together, maintain a consistent seam allowance, slow down around curves and small components, and complete flat decorations before closing the body. Reinforce genuine stress points rather than simply adding more stitches everywhere. Leave the planned turning opening unsewn, then inspect the shell before adding stuffing because sewing errors are much easier to correct while the product is still empty.
Common sewing situations and practical controls. Use the actual pattern and fabric behaviour as the final guide.
| Sewing Situation | Practical Starting Approach | Warning Sign to Watch |
| Main body seam | Straight stitch around 2.0-2.8 mm as a test range | Gaps appear when light stuffing pressure is applied. |
| Gentle curve | Sew continuously at a controlled speed | Seam allowance drifts or one layer feeds ahead. |
| Tight curve | Sew 2-5 stitches, pause, and reposition as needed | Curve becomes angular, flattened, or uneven. |
| Inserted ear or limb | Baste first, then sew the final body seam | Component moves several millimetres from the marked position. |
| Thick seam crossing | Reduce speed; avoid pulling fabric through the needle | Skipped stitches, needle deflection, or compressed pile. |
| Stretchy plush | Test feed and stitch before body assembly | One panel becomes longer than its matching panel. |
Build the Plush in a Logical Order
A reliable assembly sequence normally moves from flat work to three-dimensional work. Embroidery, appliqué, and printed details are easiest to position while the fabric panel can lie flat. Small components such as ears, tails, and some limbs can then be sewn separately and prepared for insertion into the body seam. When these parts are placed between the right sides of the main panels, most of the finished component points inward and seems to disappear inside the body. That feels wrong the first time, but after turning, the ear or limb emerges in the correct direction. Marking orientation before sewing prevents one of the most common beginner errors: beautifully sewing a component in place only to discover that it points inward, backward, or downward.
Basting is useful when several layers must stay aligned. A temporary line of stitches inside the final seam can hold an ear or tail while the body seam is sewn over it. The construction order can also reduce bulk. If four thick components meet at one point, the machine may struggle with a stack of eight or more layers. Sometimes the better solution is not a bigger needle but a revised sequence that spreads the seam intersections apart. This is one reason experienced plush makers think about assembly before they start sewing: the pattern describes the shape, but the operation order determines how easily and consistently that shape can actually be built.
Sew Curves Without Fighting the Machine
Tight curves should be sewn as a series of small directional changes rather than one fast sweeping movement. Keep your eyes slightly ahead of the needle and watch the seam allowance. On a tight curve, sew a few stitches, stop with the needle down, lift the presser foot if necessary, rotate the fabric slightly, and continue. This approach produces a smoother arc than pulling the fabric around the needle. Do not drag the fabric from behind the presser foot; the feed dogs should move it while your hands guide alignment. Pulling can stretch one layer, change stitch formation, or make the inner panel travel farther than the outer panel.
After sewing, remember that a curve may look awkward while the seam allowance is still trapped inside. Concave curves often need small clips toward the stitching line so the allowance can spread after turning. Convex curves may benefit from trimming or small notches to reduce bulk. Never cut through the actual stitch line. Pile fabric adds one more visual issue because fibres become trapped between the two panels. Once the seam is turned, gently teasing those fibres out with a blunt needle or small brush often makes the edge appear much cleaner. Evaluate the curve after turning and applying light internal pressure, because that is much closer to how the finished plush will behave.
Treat Facial Details and Attachments as Structure
Eyes, noses, mouths, ears, and small accessories carry more visual weight than their size suggests. Moving an eye by only a few millimetres can change expression, especially on a small head. Mark facial positions from a centre line or pattern reference instead of measuring each feature only from the nearest edge. Embroidery is often completed before body assembly because the panel lies flat and positioning is easier to control. Appliqué, printing, and woven details also benefit from flat access. If rigid eyes, noses, or hardware are used, their installation should be planned with the surrounding seam and intended use in mind rather than added as an afterthought.
A component is not fully specified by a phrase such as ’12 mm plastic eye.’ Shape, material, colour, fixing method, position, and installation all affect the final result. Products intended for children may also require attention to target market, age grade, attachment strength, and small-part risks. Professional quality systems can include pull or torque checks for attached components, seam-strength evaluation, and small-parts assessment. A handmade project may not require laboratory testing, but it still benefits from the same principle: an attachment that looks secure is not automatically structurally secure, and a visually correct part can still create a weak point if the fixing method does not suit the fabric and expected use.
How Do You Turn, Stuff, and Close It?
Turn the sewn shell gently, clip or trim seam allowances where necessary, push out narrow areas with a blunt tool, and add filling in small amounts. Fill the furthest areas first and compare both sides throughout the process. The correct amount of stuffing is the amount that creates the intended shape and firmness without distorting seams, facial proportions, or posture.
Turn Without Distorting the Shape
Turning is the first point where the project begins to look like a real character, and it is also the best time for a full seam inspection. Work gradually rather than pulling hard on one narrow area. Push the widest body sections through the opening first, then deal with ears, legs, tails, and other small shapes. A blunt turning tool can help define ear tips and corners, but avoid scissors or other sharp objects because one accidental puncture can create a repair that is more visible than the original sewing. If a curve refuses to open, check whether the seam allowance has been clipped or trimmed appropriately before assuming the pattern is wrong.
Once the shell is right side out, run your fingers along every major seam and compare both sides. Look for flat spots, twisted limbs, trapped pile, skipped stitches, and places where two seam intersections do not meet cleanly. Check the orientation of ears and arms before filling makes those areas rigid. This inspection takes only a few minutes, but it is much easier to open and repair an empty shell than a densely stuffed body. One of the most useful habits in plush making is to treat turning as a quality checkpoint rather than a simple transition between sewing and stuffing.
Use Stuffing to Shape the Character
Stuffing should be used to develop the shape, not simply to occupy empty space. Start with small, loosened amounts and fill the furthest areas first. Toes, paw tips, tail ends, and narrow limbs should receive fibre before the torso becomes full and blocks access. Alternate between symmetrical areas so you can compare them as the form develops. If you completely fill the left leg before touching the right, you may not notice that one is firmer until the difference is difficult to correct. Massage the outside surface regularly to distribute the fibre and reveal hollow pockets or hard lumps.
Look at the plush from the front, side, back, and top while you work. A face can look balanced from the front but project too far forward from the side. A seated animal can look symmetrical while still leaning backward because too much fibre sits behind the hips. In repeated production, these subjective observations are often translated into measurable references such as total filling weight, zoned filling, firmness expectations, and comparison against an approved sample. Even for one handmade toy, that mindset helps: decide what shape you are trying to create and add fibre deliberately to support it instead of assuming that more filling always means a better result.
Close the Opening Cleanly
Before closing the opening, compare the overall silhouette one final time. The seam allowances at the opening should fold inward along the same line as the surrounding machine-sewn seam. A ladder stitch is useful because the thread alternates between the folded edges and becomes mostly hidden when it is tightened. Take small, even bites from one side and then the other. Rather than pulling every stitch fully tight as you go, sew several loose stitches and then draw them together gradually. This gives the edges time to align and reduces the risk of puckering.
Pay particular attention to the filling directly behind the closure. Too little creates a visible hollow; too much pushes outward against the hand stitches and can create a hard ridge. Add or remove a small amount before completing the last few stitches. Once the seam is secured, gently massage the surrounding fibre and, on pile fabric, tease trapped fibres out of the closure so the surface blends with the rest of the body. The goal is not only to hide the thread. A good closing seam restores the same contour and softness as the adjacent machine-sewn areas, so the final opening does not become the most noticeable part of the finished toy.
What Mistakes Affect Shape and Strength?
Shape and strength problems usually come from accumulated variation in pattern accuracy, cutting, fabric direction, seam allowance, attachment placement, and stuffing. A crooked head may not be a stuffing problem, and a split seam may not be a thread problem. The most effective troubleshooting method is to trace the defect backward through pattern, cutting, sewing, filling, and finishing instead of repairing only what is visible.
Diagnose Shape Problems at Their Source
When the finished animal looks uneven, measure before reshaping it by hand. Compare left and right seam lines, check whether mirrored pieces came from the same pattern version, confirm that pile and stretch run in the same direction, and measure eye or ear placement from a centre reference. Several small differences can combine into one obvious defect. A 2-3 mm cutting variation, another 2-3 mm of seam variation, and slightly heavier filling on one cheek may each seem insignificant, yet together they can change the expression and silhouette. Stuffing amplifies geometry, so small upstream errors become more visible once the body is under internal pressure.
Recognisable characters need even stricter attention because people notice the face before they notice construction quality. If a sample does not resemble the original artwork, the cause may be head-body proportion, pattern curvature, pile direction, embroidery placement, or filling distribution rather than the artwork itself. A useful diagnostic sequence is to compare silhouette first, then key facial positions, then material behaviour, and finally stuffing. This prevents the common mistake of adding more fibre to fix a pattern problem or moving the eyes to compensate for a head shape that is fundamentally incorrect. The closer the character must match a reference, the more important it becomes to identify the true source of the visual difference.
Prevent Puckering, Weak Seams, and Splits
Seam puckering can come from excessive tension, fabric stretch, uneven feed, or unsuitable stitch settings. Start with a test seam using the same fabric direction and number of layers as the real construction. If one layer is longer after sewing, investigate feeding and handling before changing tension. A split seam needs a different diagnosis. Check whether the thread broke, whether stitches pulled through the fabric, whether the fabric tore beside the seam, or whether the seam only opened after heavy stuffing. Each failure points toward a different solution, and simply sewing over the area again may hide the symptom without correcting the cause.
Stress points deserve special attention around necks, limb roots, attachment loops, and closing seams. These locations experience concentrated forces that are different from the pressure on a broad body panel. Stronger thread can help in some cases, but durability is a combination of fabric strength, seam allowance, stitch formation, attachment geometry, and filling pressure. In professional plush quality control, some of these characteristics are evaluated through seam or tensile testing and pull or torque checks on attached components. A home sewer may not have that equipment, but the same logic applies: inspect the failure mode, reduce unnecessary stress, and reinforce only where the construction actually needs it.
Control Problems Before They Multiply
One handmade toy can be repaired by opening a seam and adjusting it. Repeated production needs a more disciplined habit: find the cause before the same defect appears again. Identify exactly where the problem occurs, compare it with the pattern or approved reference, determine which process can create it, correct that process, and then check the next several pieces to confirm the change worked. If an ear is repeatedly 8 mm too low, moving each finished ear by hand is not a real solution. The better question is whether the placement mark, seam allowance, basting method, or assembly order is causing the shift.
Factories formalise this approach through staged inspection. Incoming material checks can stop wrong colours or components before cutting. In-process checks can catch decoration or sewing deviations before hundreds of pieces move forward. Finished checks assess the complete item, and outgoing inspection can confirm packaging, labels, and shipment condition. Ewin Toys uses a multi-stage quality structure built around incoming, in-process, finished, and outgoing controls rather than relying on a single final visual check. The practical lesson for any maker is the same: inspect at the moment a problem is cheapest to correct, because a ten-second check before the next operation can save an hour of repair later.
How Does Factory Plush Sewing Differ?

Factory plush sewing differs because every important judgement must become repeatable. Instead of one person adjusting a toy by eye, production uses released patterns, defined materials, approved artwork, sewing instructions, filling references, Golden Samples, and quality checkpoints. The sewing machine is only one part of a controlled manufacturing route designed to reproduce the same shape, appearance, and construction across many pieces.
From Prototype to Controlled Production
A handmade plush can succeed because one skilled person remembers how it was made. Commercial production cannot depend on memory. Before bulk manufacturing starts, the approved design needs to be translated into controlled information such as the released pattern revision, material and component BOM, embroidery or printing file, component placement, filling reference, critical sewing notes, approved Golden Sample, quality checkpoints, and packaging specification. This does not mean every project needs a thick technical manual. It means the decisions that change the finished product must be clear enough that different people can work from the same version without guessing which sample, colour, component, or instruction is current.
This distinction becomes especially important when samples evolve. A V1 head may be too narrow, V2 may change the ear angle, and the final approved version may use a different fabric or embroidery position. If the sewing line receives an old pattern while the embroidery team uses the new artwork, both departments can technically follow their instructions and still create the wrong product. Ewin Toys’ production approach links approved samples with pattern, BOM, artwork, and quality references so that sample-to-production handoff is managed as one system. For a brand developing a custom plush, this controlled handoff is often more important than the speed of any single sewing operation because it determines whether the approved design survives the transition into quantity production.
Match Machines and Skills to the Structure
Factory plush sewing is not simply home sewing performed faster. A standard lockstitch machine can handle a large portion of conventional body seams, but different structures can benefit from overlock, zigzag, double-needle, cylinder-bed, post-bed, blind-stitch, and programmable or template sewing. A narrow tubular arm may be awkward on a flat-bed machine, while a repeat reinforcement path may be more consistent when the motion is controlled by a template or programme. The useful question is not how many machine types a factory owns; it is whether the machine, pattern, operation sequence, and operator skill are matched to the actual construction of the plush.
Skill matters just as much as equipment. A simple two-panel animal, a long-pile character with layered hair, a miniature keychain plush, and a collectible figure with clothing and accessories do not have the same sewing load. Curves, small openings, hidden seams, and multi-layer intersections can slow production and increase rework even when enough machines are available. Experienced manufacturing therefore plans capacity around construction complexity, standard time, skill requirements, line balance, decoration, handwork, and the required delivery window. Ewin Toys’ production system combines high-throughput and specialised sewing resources with product development, stuffing, finishing, and quality functions, reflecting the reality that a complex plush is built through several connected operations rather than one sewing line working in isolation.
Control Shape, Filling, and Quality Together
The sewing line creates the shell, but the character is not fully defined until filling, shaping, finishing, and inspection are complete. A correctly sewn head can still look wrong if the cheeks are filled unevenly. A well-proportioned body can lean if the centre of gravity changes. Long pile can hide the true contour until grooming reveals whether the face and seams match the approved sample. For that reason, stuffing and finishing should be linked back to the same product definition used during sewing. Weight, local filling distribution, hand feel, posture, and key appearance points can all become part of the production reference when the design requires that level of control.
Quality also works best when it follows the process rather than appearing only at the end. Material inspection helps prevent wrong colour lots or unsuitable components from entering production. In-process checks can catch deviations while they are still concentrated around one operation. Finished inspection reviews the completed product, while needle and foreign-material control, seam-strength checks, pull or torque evaluation, packaging review, and outgoing inspection may be added according to product and market requirements. Ewin Toys operates across development, sewing, stuffing, hand assembly, finishing, and staged quality review, so a custom project can move from a single approved prototype toward repeatable production under one coordinated system. The practical difference is simple: consistency comes from connecting every stage to the same approved product, not from asking the sewing machine to solve every problem.
The basic sewing principles stay similar, but factory production turns personal judgement into controlled, repeatable information.
| Area | Single Handmade Plush | Controlled Factory Production |
| Pattern | One printed or physical pattern | Released pattern with revision control |
| Material | Selected mainly by feel and appearance | Defined material, colour, pile/GSM or other relevant specification |
| Sewing | Maker adjusts during construction | Operation sequence, seam references, skill and process controls |
| Filling | Adjusted mainly by touch and appearance | Weight, zone, firmness, posture, and approved shape references as needed |
| Appearance | Maker judgement | Golden Sample plus defined critical visual points |
| Quality | Final visual check | Incoming, in-process, finished, and outgoing checkpoints |
| Change control | Maker remembers the change | Revision record and controlled release of current files |
| Scale | One or a few pieces | Repeatable output across production quantities |
Conclusion
Making a stuffed animal with a sewing machine follows a short visible sequence: prepare the pattern, cut the fabric, sew the shell, turn it, add filling, shape the body, and close the opening. The quality of the result, however, depends on decisions that are easy to overlook. ‘Cut’ includes grain, stretch, nap, and mirrored accuracy. ‘Sew’ includes seam allowance, curve control, attachment position, and stress points. ‘Stuff’ includes distribution, firmness, symmetry, and posture. When each step is treated as part of the final three-dimensional shape, the project becomes easier to troubleshoot because you can trace a problem back to the stage that actually created it.
For a personal project, your hands and eyes can make small adjustments as you work, and that flexibility is part of the pleasure of handmade plush. When the same design needs to become a product, those adjustments must be translated into information that another person can follow: a stable pattern, defined materials, approved sample, filling reference, sewing notes, and quality checkpoints. That transition from one good sample to repeatable production is where experienced plush development matters most. Whether you are sewing your first animal at home or preparing an original character for manufacturing, the central principle remains the same: good plush is not created by one perfect stitch; it is created when every small construction decision supports the same intended shape.
Frequently Asked Questions
Can you make a stuffed animal with a regular sewing machine?
Yes. A regular household sewing machine can make many stuffed animals, especially designs based on fleece, cotton, felt, minky, or other fabrics that your machine can feed reliably. The main limitations are usually not machine power but tight curves, very thick seam intersections, tiny tubular parts, and slippery or highly stretchy materials. Start with a simple pattern, test the actual fabric, use a suitable needle, and sew slowly around difficult areas. Specialised industrial machines become more useful when the design, material, quantity, or repeatability requirement becomes more complex.
What stitch is best for sewing stuffed animals?
A straight stitch is the most common choice for many stuffed-animal body seams. A practical home-sewing test range is around 2.0-2.8 mm, but the best setting depends on the fabric, thread, machine, seam allowance, and expected stress. Stretchy fabrics may require a different stitch strategy, and stress points may need reinforcement based on the construction rather than simply a shorter stitch. Always sew a test seam with the same fabric layers as the real project, then apply light pressure to check whether the seam opens, puckers, or stretches unexpectedly.
What fabric is easiest for a beginner stuffed animal?
Stable fleece or a medium-weight woven fabric is often easier for a first stuffed animal because it does not move as aggressively as very stretchy minky or long-pile faux fur. Short-pile plush can also work well when you want a more traditional soft-toy appearance. The easiest fabric is one that lets you see marks, control the edge, and maintain a consistent seam allowance. Once you are comfortable with the pattern and assembly sequence, you can move into softer, stretchier, or longer-pile materials and adjust the pattern placement and sewing technique accordingly.
How much seam allowance should a stuffed animal have?
Many home stuffed-animal patterns use a seam allowance somewhere around 6-10 mm, but the pattern instructions should always take priority. The correct allowance depends on fabric thickness, product size, seam shape, and construction method. Very narrow allowances can be difficult to control and may leave less material to resist stress, while unnecessarily wide allowances can create bulk around small curves. More important than choosing one universal number is keeping the allowance consistent throughout the seam so mirrored pieces finish at the same size and the planned pattern geometry is preserved.
How do you stop stuffing from becoming lumpy?
Use small, loosened amounts of fibre instead of pushing one large compressed piece into the body. Fill the furthest points first, alternate between symmetrical areas, and massage the outside surface regularly so the fibre blends instead of forming hard pockets. If a lump appears, pull some filling back out and redistribute it rather than adding more around it. The goal is even support for the intended shape, not maximum density. Faces and narrow limbs usually need more careful local control because small differences in filling can noticeably change expression, firmness, or symmetry.
When should a plush design move from home sewing to professional manufacturing? Professional manufacturing becomes useful when the goal changes from making one successful item to reproducing an approved design consistently. If a character will be sold, licensed, produced in multiple colours or SKUs, fitted with specific components, packed for retail, or made in meaningful quantities, the project usually needs more formal control over patterns, materials, sample revisions, filling, attachments, quality, and packaging. A manufacturer such as Ewin Toys can help translate artwork or a handmade prototype into a production-ready specification so the design is not dependent on one maker remembering how the original sample was constructed.