Making a plushie without sewing sounds almost too easy until you try to turn a flat piece of fabric into something that feels balanced, soft and recognisable. A no-sew project removes the needle and thread, but it does not remove the decisions that control the final result. Fabric thickness, stretch, glue placement, stuffing density and the shape of the template all affect how the plushie looks and feels. For a simple craft, however, the process can be refreshingly accessible, and you can learn a surprising amount about plush construction from one small project.
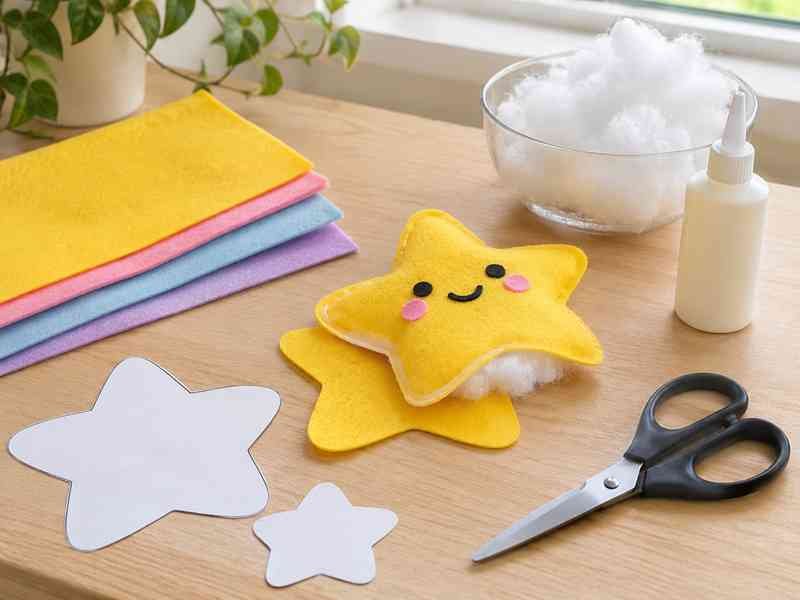
You can make a plushie without sewing by cutting two matching felt shapes, bonding most of the perimeter with fabric glue or carefully applied hot glue, adding polyester fiberfill, and sealing the remaining opening. A sock plushie is another simple option: fill the sock, divide the shape with ties or elastic bands, and attach soft facial details. These methods work best for simple, lightweight craft plushies with limited structural stress.
The interesting part begins when the design becomes more ambitious. A flat ghost or heart may take only a few steps, while a character with a shaped muzzle, separate limbs, a standing pose or accurate facial proportions quickly exposes the limits of glue-only construction. That contrast is useful rather than discouraging. A small no-sew plush can become a practical prototype that teaches you which details matter most before you move toward a more engineered, repeatable plush product.
What Do You Need for a No-Sew Plushie?
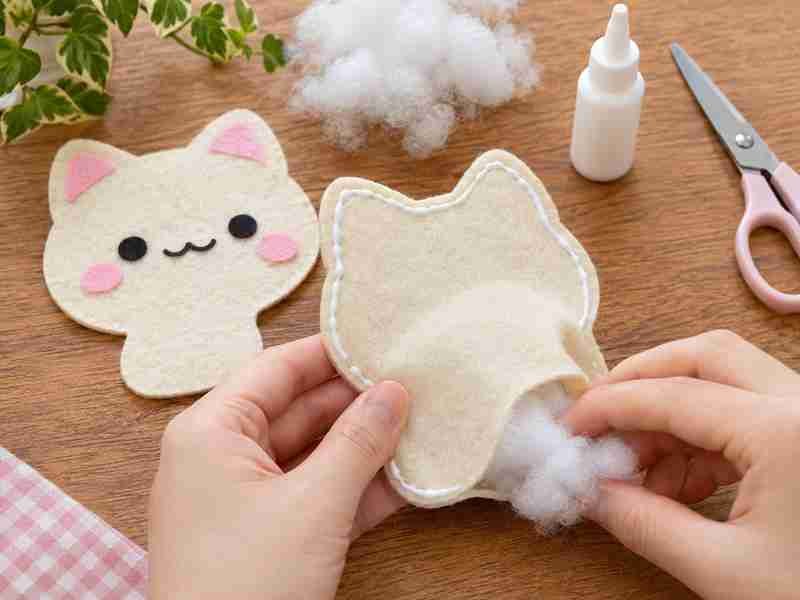
A basic no-sew plushie needs a stable outer material, soft filling, a suitable adhesive, sharp scissors and a simple pattern or template. Felt is usually the easiest fabric for beginners, while socks are useful for rounded forms. The best results come from matching the fabric, glue and stuffing to the intended shape instead of simply choosing whichever material feels softest in the craft shop.
Fabric and Filling
For a first project, felt is usually easier to control than fleece, minky or faux fur because it lies relatively flat, keeps a visible cutting edge and does not stretch dramatically as filling is added. Craft felt around 1-2 mm thick is a practical starting point for small decorative plushies because it can hold a clear silhouette without becoming excessively rigid. Fleece feels softer, but its stretch makes matching two cut pieces more difficult. Socks are useful for rounded animals because the tubular shape already provides a three-dimensional shell. Polyester fiberfill is generally the easiest filling because it can be teased apart and added in small amounts. Avoid pushing one dense ball into the centre. Instead, loosen the fiber with your fingers, fill narrow areas first, then build the main body gradually. If the surface starts to look strained or the outline becomes distorted, remove some filling before closing the plushie.
| Material or Tool | Practical Starting Point | Best Use | Main Limitation |
| Craft felt | About 1-2 mm thick | Flat animals, hearts, stars and simple characters | Less cuddly than plush fabric |
| Light fleece | Soft, low-bulk type | Softer rounded crafts | More stretch and edge movement |
| Sock knit | Clean, medium-stretch sock | Rabbits, bears and round animals | Harder to control exact proportions |
| Polyester fiberfill | Add in small loose amounts | Most DIY plushies | Overfilling distorts shape and stresses edges |
| Fabric glue | Flexible textile-grade formula | Softer bonded seams | Longer curing time |
| Hot glue | Narrow controlled application | Fast felt crafts and flat details | Can create a hard ridge |
Glue and Tools
Fabric glue and hot glue solve slightly different problems, so it helps to decide whether flexibility or speed matters more. Fabric glue generally takes longer to cure but can leave a softer edge when the formula remains flexible after drying. Hot glue sets quickly and is convenient for felt crafts, yet a thick bead can create a hard perimeter that becomes obvious when the plushie is squeezed. On a small felt project, placing a narrow adhesive line roughly 3-5 mm inside the cut edge can be a useful starting point, although thicker materials may need a wider bonding area. Sharp scissors are equally important because uneven cutting becomes much more visible after the front and back pieces are aligned. A washable fabric marker, paper template, clips and a blunt stick for positioning stuffing are inexpensive tools that make the process more controlled without turning a simple craft into a complicated workshop project.
Simple Patterns
You do not need professional pattern software for a basic no-sew plushie, but even a simple paper template greatly improves symmetry. Fold a sheet of paper in half, draw one side of the intended shape along the fold, cut it, and open the paper to create a balanced outline. Before transferring the template to fabric, check the narrowest areas. Thin tails, ears and legs are difficult to stuff and give the adhesive very little surface to grip. For a hand-sized felt plushie, keeping narrow projections around 15-20 mm wide is a practical beginner-friendly guideline rather than a strict rule. The most useful test is whether the character remains recognisable as a solid silhouette. If its identity depends on a strongly projected muzzle, sculpted forehead or several overlapping three-dimensional parts, a two-piece no-sew pattern will probably require significant simplification.
Which No-Sew Method Works Best?
Felt-and-glue construction works best for flat graphic shapes, while sock construction is better for rounded bodies with fewer bonded edges. Felt gives more control over outlines and facial placement; socks create a softer, fuller form with less cutting. Choose the method according to your priority: clean shape, speed, softness, child-friendly crafting, repeatability, or a more three-dimensional handmade appearance that does not require precise pattern work.
Felt vs Sock
Felt gives you greater control over the outside shape because you can trace the same template twice and trim the two pieces until they match. That makes it particularly useful for stars, clouds, simple animals, food characters and graphic mascots with a strong front silhouette. A sock works differently. Instead of building the shell from separate panels, you begin with a ready-made textile tube that naturally becomes round as it is filled. This makes a sock useful for rabbits, bears and other soft, bulbous characters, but it also means the final shape is influenced by fabric stretch and filling pressure. If you make five felt plushies from the same paper template, the outlines can be reasonably consistent. Five sock plushies shaped only by hand are more likely to vary in head size, neck position and overall fullness. That variation is often charming in a one-off craft, but it matters if you are trying to reproduce the same design repeatedly.
| Goal | Better Method | Practical Reason |
| Clean flat silhouette | Felt + adhesive | Template can be traced and repeated accurately |
| Rounded animal body | Sock | Existing tubular fabric creates volume quickly |
| Fast beginner project | Felt | Few construction steps and easy trimming |
| Softer hand feel | Sock | Fewer hard bonded perimeter edges |
| Detailed graphic face | Felt | Flat surface makes placement easier |
| Repeatable handmade copies | Felt template | Easier to control the same outer outline |
| Simple child craft | Pre-cut felt or sock | Reduces precision cutting and complex assembly |
Softness and Structure
The softest fabric does not automatically create the softest plushie because edge construction and stuffing density strongly affect the hand feel. A soft piece of fleece joined with a thick line of cooled hot glue can feel surprisingly rigid around the border, while an ordinary sock may feel softer because most of the body is continuous fabric. Stuffing changes the result again. A lightly filled felt plushie can remain flexible, whereas an overfilled sock can become tight and firm. It is useful to think of softness as the result of three interacting variables: fabric softness, edge flexibility and filling density. If any one of those becomes too rigid, the entire plushie can feel harder than expected. For a cuddly craft, stop filling when the shape holds its form but still compresses easily in your hand. If the surface becomes shiny, strained or visibly stretched, you have probably exceeded what the material comfortably supports.
Keep the Design Simple
Simple construction usually produces a better no-sew plushie than a design overloaded with small attachments. Every additional glued component creates another alignment problem, another hard area and another potential failure point. Before adding decorative pieces, identify the features that actually make the character recognisable: the overall silhouette, head-to-body ratio, eye placement, mouth shape, one or two distinctive colour blocks, and perhaps a signature ear, horn or patch. If those elements are correct, the plushie can feel convincing even with fewer parts. If those elements are wrong, adding twenty tiny details rarely saves the design. This is a useful lesson beyond home crafting. Experienced plush development often begins by protecting the most important visual features first, then adds secondary detail only after proportion and basic form are working. A no-sew project gives you a simple way to practise that discipline without investing much time or material.
How Do You Make a Felt Plushie Without Sewing?
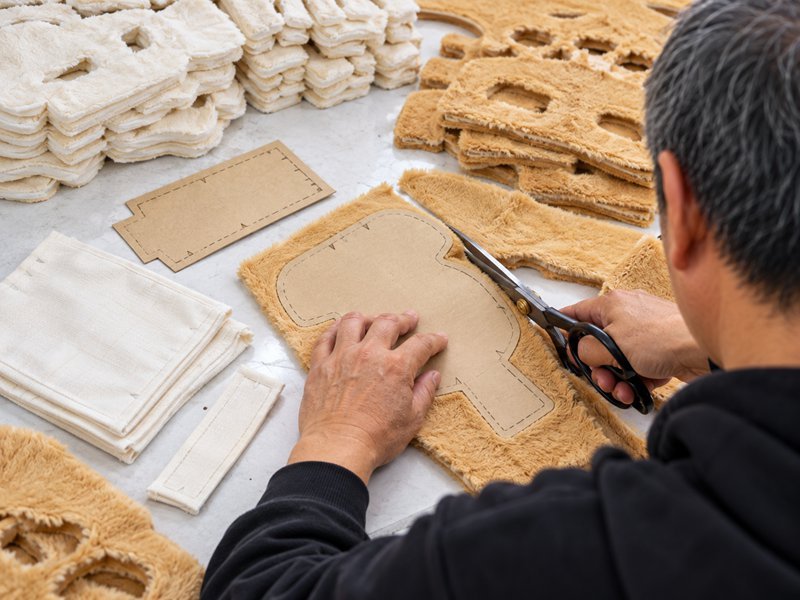
To make a felt plushie without sewing, prepare a simple template, cut two matching felt pieces, position the face while the fabric is flat, bond most of the perimeter, leave a filling opening, add fiberfill gradually, and seal the final edge. Clean cutting, controlled adhesive and even stuffing have a bigger effect on the result than adding complicated decoration, especially on small hand-sized craft designs.
Pattern and Cutting
Start with a shape that remains clear when viewed only as an outline. Bears, cats, ghosts, clouds, fruit and rounded fantasy creatures are easier than designs with thin fingers, long narrow tails or many overlapping parts. Trace the same template twice, then stack the two felt pieces together before gluing. If one ear extends 4-5 mm farther than the other, trim the difference while both layers are still flat. That small correction becomes much harder after stuffing. Facial details should also be placed before assembly. Position paper versions of the eyes and mouth first, step back roughly one metre, and look at the expression from normal viewing distance. A few millimetres of eye movement can change a face more than you might expect. Once the placement looks balanced, replace the paper with felt details and attach them. Working on a flat surface also keeps glue away from the three-dimensional body, where it is harder to control cleanly.
Bond the Edges
Align the two felt pieces and work around the perimeter in manageable sections rather than coating the whole edge at once. Sections around 30-50 mm long are usually easier to control because you can press the layers together before the adhesive moves or sets. Keep the glue slightly inside the outer edge and leave an opening for filling. On a hand-sized plushie, an opening around 50-80 mm is often easier to use than a tiny gap that forces you to compress the fiberfill into hard lumps. Choose a relatively straight, less visible part of the outline and avoid leaving the opening at the tip of an ear, a narrow tail or a sharp corner. Those areas are difficult to close neatly once the body is filled. After bonding most of the perimeter, give the adhesive enough time to reach the handling strength stated by the manufacturer. Stuffing too soon can reopen a joint that looks dry on the surface but is still weak internally.
Stuff and Shape
Fill the narrow areas first because they become harder to reach once the main body is full. Push small amounts of loosened fiber into ears, points or paws with your fingers or the blunt end of a clean tool, then build volume in the centre. Rotate the plushie frequently and judge the silhouette from both sides instead of focusing only on thickness. If one cheek looks larger, moving or removing filling is often more effective than adding more to the opposite side. Do not treat the plushie like a container that must be filled to capacity. The purpose of the stuffing is to create a controlled form, not to occupy every possible space. When the outline looks right, pause for a few minutes and massage the body gently. Fiberfill settles as it is handled, and this short rest often reveals a hollow corner or an overfilled area before the final opening is closed.
Close and Finish
Before sealing the last opening, push loose fiber away from the bonding surface because trapped filling can prevent the two fabric layers from making full contact. Close the gap in short stages, especially if the body is under pressure from the stuffing. If the edges keep separating, remove or redistribute some filling rather than simply adding more adhesive. Once the bond has cured, perform a simple home durability check by squeezing the body repeatedly, flexing the perimeter and lightly pulling any flat decorative parts. Ten to twenty squeezes will often reveal weak corners or an opening that was not properly sealed. This is not a formal safety test, but it is useful for a craft object. Finish by redistributing filling with your fingers and compare the result with the original template. The first version is valuable even if it is imperfect, because it gives you practical information about eye spacing, ear width, filling amount and where the opening should be placed next time.
How Do You Make a Sock Plushie Without Sewing?
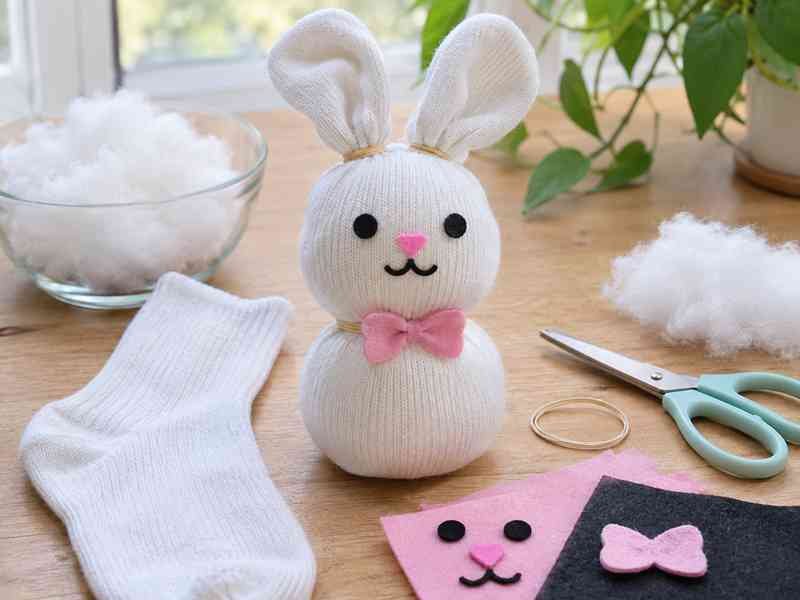
A sock plushie is made by adding soft filling to a clean sock, shaping the body with your hands, dividing the head and torso with elastic bands or ties, using remaining fabric for ears or other details, and adding a simple face. The method is quick and naturally rounded, but symmetry and filling density need more attention than many beginners expect.
Shape the Body
Choose a sock with enough stretch to accommodate filling without becoming so thin that the knit looks transparent. Add fiberfill gradually through the opening and begin shaping at the toe because that closed end naturally creates a rounded head or body section. Do not fill the entire sock first and then try to correct the proportions. Instead, build the volume in stages and hold the sock upright regularly so you can judge how the character reads from the front and side. When you have enough filling, decide where the neck should sit and place an elastic band temporarily before tightening it. For many simple animal crafts, a head taking roughly one-third to two-fifths of the visible height can look balanced, although cute character designs often use much larger heads intentionally. The important point is to check the proportion before the division becomes difficult to undo. Rotate the body while filling because stretchy knit can easily develop a lean if all the fiber is pushed from one direction.
Ears and Limbs
Use the existing sock fabric whenever possible because every separate attachment adds another weak point and another opportunity for visual misalignment. The unfilled cuff can sometimes be divided into two simple ears, folded into a hat, gathered into a decorative top or shaped into a short tail. If the design needs separate limbs, broad felt pieces are easier to attach than narrow strips because a wider base spreads the load over a larger bonding area. Think about how the finished object will be handled. A flat felt arm may be decorative when the plushie sits on a shelf, but it becomes a load-bearing component if someone repeatedly picks up the plushie by that arm. For a lightly handled display piece, glued appendages may be perfectly acceptable. For an object that will be carried, squeezed or played with repeatedly, simplifying the design is often more reliable than continuing to add adhesive to a component that the construction method was never intended to support.
Place the Face
Never finalise the face while the sock is still flat because the apparent spacing changes as the textile becomes rounded. Shape the head first, then position temporary paper eyes and a mouth on the three-dimensional surface. Check the face close up for alignment, at arm’s length for expression, and from about one metre away for overall character recognition. This simple process is useful because small shifts in eye height or spacing can make a face look sleepy, surprised, angry or simply unbalanced. Flat felt features are a practical no-sew choice because they are light, easy to reposition during planning and softer than many hard plastic components. If the finished object may be used by a young child, avoiding detachable beads or buttons is a more cautious home-craft approach. The main principle is simple: judge facial placement on the final rounded surface rather than relying on measurements taken from the unfilled sock.
Secure the Opening
The open cuff is usually the most vulnerable part of a sock plushie because the filling pushes directly toward it during squeezing. An elastic band can hold the opening for a decorative craft, but it should not automatically be treated as a permanent closure for an object that will be heavily handled. Where possible, fold excess fabric inward and reinforce the fold with a textile-compatible adhesive, or turn the gathered section into part of the visual design such as a hat or top knot. After the adhesive cures, compress the plush several times and watch the opening closely. If the closure starts to spread, move some filling away from the top rather than tightening the band indefinitely. Also inspect the neck division. If it is cinched too tightly, the head can appear disconnected from the body and the fabric can develop deep puckers. A good sock plush should hold its filling during normal handling without needing constant adjustment after every squeeze.
Is Glue Strong Enough for a Plushie?
Glue can be strong enough for decorative plushies, flat felt crafts and lightly handled projects when the adhesive is compatible with the fabric and allowed to cure fully. It is less suitable for high-stress limbs, washable products, children’s toys or complex three-dimensional structures. The useful question is not whether glue is strong in general, but whether that particular bond can tolerate the way the finished plushie will be used.
Hot Glue or Fabric Glue
Hot glue is convenient because it grips quickly, which can make a small felt project possible in one craft session. The trade-off is stiffness. Once cooled, hot-melt adhesive becomes a solid polymer layer, and a heavy bead can create a hard ring around the plushie. Fabric glue often cures more slowly but may remain more flexible, depending on the formula. Because products vary, the most practical approach is to make a test bond with two fabric scraps before building the full plushie. Apply the glue exactly as you intend to use it, allow it to cure fully, then bend the joint back and forth 20-30 times, squeeze it and pull the layers gently apart. Watch for peeling at the edges and pay attention to how hard the bonded area feels. This simple comparison does not replace formal testing, but it tells you far more about your specific materials than assuming all fabric glues or all hot glues behave the same way.
Where Bonds Fail
Adhesive joints usually fail where force is concentrated rather than at random locations. The tip of a long ear, a narrow arm, the final stuffing opening, a heavy accessory and a sharply angled corner all experience more stress than a flat cheek patch. A decorative spot on the body carries almost no load, while an arm can become a handle the moment someone lifts the plushie by it. This is why a wide attachment base generally works better than a narrow one, and rounded transitions tend to spread force more effectively than sharp internal corners. If you find yourself applying layer after layer of glue to keep a structural feature attached, the problem may be the construction method rather than the amount of adhesive. For a no-sew craft, redesigning a long thin limb into a shorter, broader shape can improve both appearance and durability. Good construction is often about reducing unnecessary stress before it reaches the bond.
Washing and Durability
A washable fabric does not automatically make the completed plushie washable because the weakest material in the whole construction determines the result. Water, detergent, tumbling and heat can affect the outer fabric, adhesive, decoration and filling in different ways. Some adhesives soften or peel, some decorative layers shift, and fiberfill can clump if the piece dries unevenly. Unless the adhesive manufacturer specifically states that the cured bond can withstand washing under the intended conditions, spot cleaning is a safer expectation for a home no-sew project. This distinction becomes more important when a craft idea develops into a product. Commercial plush durability is normally considered through several separate controls, such as seam or bond integrity, attachment retention, colour behaviour, material wear and access to filling. A successful home prototype proves that a concept can look appealing; it does not by itself prove that the same construction can tolerate long-term use, repeated cleaning or retail distribution.
Children’s Use
Be especially conservative when a no-sew plushie may be handled by young children because a cosmetic failure can become a functional problem. A loose felt patch is annoying, but a detached button, bead or hard plastic eye can create a very different risk. An opening that releases filling is also more important than a small cosmetic wrinkle. For home crafting, soft flat facial details, minimal detachable parts and regular visual inspection are sensible precautions. Hot-glue equipment should remain under adult control because fresh adhesive and the applicator tip can cause burns. If a plush design is intended for commercial children’s use, the requirements go beyond a simple squeeze or pull check. The finished product may need market-specific evaluation of construction, materials, components, labels and physical performance. Ewin Toys treats quality as a staged process rather than only a final visual inspection, with product-specific checks used to identify structural and component risks before bulk release.
Do Complex Plushies Need Sewing?
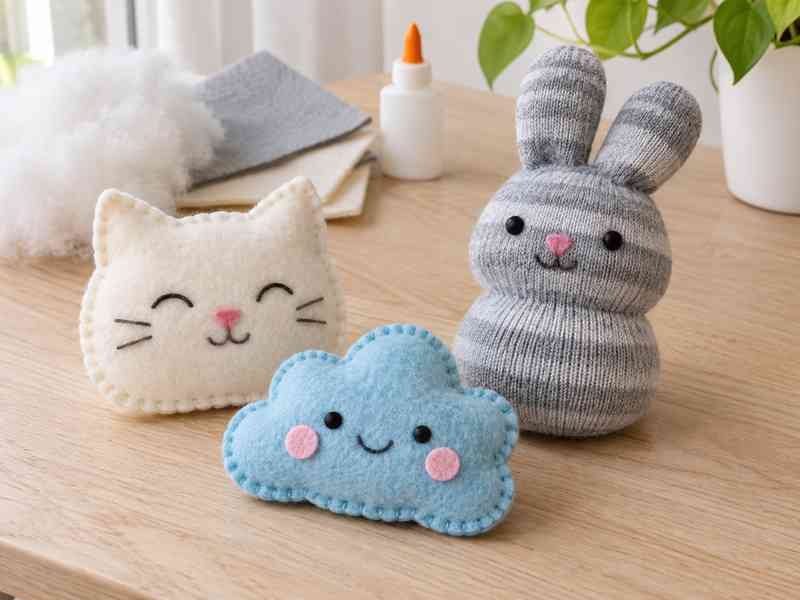
Most complex three-dimensional plushies need sewn construction because shaped pattern pieces and flexible seams give far more control over curves, volume, limb attachment and character proportions than glued flat panels. Adhesive still has a place for selected decorations and prototypes, but accurate faces, sculpted bodies, durable attachments, repeated handling and consistent production usually require pattern engineering, controlled sewing and a more deliberate approach to stuffing and assembly.
3D Shape and Patterns
A two-piece no-sew plush behaves much like a small pillow: the front and back surfaces expand outward as filling pushes between them. That works beautifully for a heart, cloud or simple ghost, but complex characters require volume in specific places rather than everywhere equally. A head may need separate pattern areas to control the forehead, cheek width, back-of-head volume, muzzle and chin. A standing animal may need leg geometry that supports the centre of gravity, while a collectible character may combine shaped ears, clothing, hair and accessories. A professional plush pattern is therefore more than an outline; it is a map of the three-dimensional surfaces that will exist after assembly. Even small pattern changes can alter eye angle, facial width or the apparent size of the head. Sewing allows those engineered surfaces to remain flexible at their joins, whereas replacing every structural seam with a thick glue line can gradually turn a soft form into a network of rigid borders.
Stuffing Controls Shape
The pattern defines where volume can exist, while the filling determines how strongly those surfaces expand. Two identical shells can look noticeably different if one is lightly filled and the other is packed tightly. Too little filling can make cheeks collapse, limbs fold and a seated body lose support. Too much can stretch facial decoration, shorten the apparent neck and increase stress at the seams. The effect is also influenced by the outer textile. Stretchy material can become rounder under the same amount of filling that barely changes a more stable fabric. This is why experienced plush development treats filling as part of shape control rather than as a final step performed by feel alone. For a home project, you can borrow the same idea by taking photos of a shape you like before closing the opening and by keeping notes on how firmly the body was filled. Those simple references make the second version much easier to reproduce.
Details Need Different Construction
Different visual features often need different manufacturing solutions. A mouth may work well as embroidery or a flat felt shape, while a large tail may need its own three-dimensional pattern and filling route. Hair may rely on directional pile fabric, clothing may need separate construction, and a heavy accessory may require a more deliberate attachment method than a decorative patch. Experienced plush development is largely about assigning the right structure to each feature instead of forcing every element into the same process. Complexity should only be added where it protects the character, improves durability or makes production more consistent. More pattern pieces are not automatically better. A well-engineered plush uses the minimum construction needed to preserve the intended silhouette, expression and function while remaining manufacturable. This approach also helps control cost, because unnecessary layers, handwork and attachments increase production effort without always improving the part of the design that people actually notice.
| Character Detail | Simple No-Sew Method | More Controlled Product Method |
| Flat eye or mouth | Glued felt | Embroidery, applique or controlled component |
| Round head | Two flat panels | Multi-panel pattern engineering |
| Small ear | Glued felt | Sewn ear inserted into a structural seam |
| Large limb | Flat glued shape | Sewn and stuffed 3D component |
| Hair or fur | Felt patch | Directional pile fabric with trimming control |
| Clothing | Glued layer | Separate garment or integrated sewn component |
| Heavy accessory | Adhesive only | Engineered attachment with defined retention method |
From Artwork to Production
Turning one successful craft into a repeatable plush product requires a controlled sequence of decisions. A practical commercial route is artwork or reference review, character and pattern engineering, material selection, decoration planning, prototype development, revision, final sample approval, BOM and specification freeze, production release, manufacturing and quality control. The approved sample matters because words such as soft, cute, round or slightly larger are subjective; a physical reference gives development, production and inspection teams something concrete to compare. The BOM then converts the visual design into repeatable material information, while the released pattern controls the geometry and current artwork files control embroidery, printing or applique placement. Ewin Toys uses this development-to-production logic to move concepts, artwork, IP references or physical samples into manufacturable plush products rather than treating sampling and bulk production as disconnected steps. A home no-sew prototype can still be extremely useful in this process because it can validate overall size, colour, silhouette and character appeal before deeper engineering begins.
A no-sew plushie is valuable precisely because it keeps the first experiment simple. You can learn how silhouette, eye placement, material, stuffing and edge construction interact without investing in specialised equipment. The best result is not necessarily the most detailed plushie; it is the one whose shape, expression and construction match its intended use. For a decorative gift or a weekend craft, felt, a sock and suitable adhesive can be more than enough. For a character that must survive repeated handling or be reproduced consistently, the construction needs to become more deliberate.
When a design moves beyond the limits of glue and flat panels, the next step is not simply to add more material or more adhesive. It is to decide which features need three-dimensional pattern work, which materials support the intended appearance, how the face should be positioned on the filled form, and how the approved sample will become a repeatable production standard. That transition from simple prototype to controlled product development is where a manufacturer such as Ewin Toys can help translate a visual concept into a plush construction that can be sampled, reviewed, refined and manufactured consistently.
Frequently Asked Questions

Can I make a plushie without any sewing at all?
Yes. A basic plushie can be made without needle and thread by using felt or a sock, textile-compatible adhesive and soft filling. The simplest felt method uses two matching pieces bonded around most of the edge, followed by stuffing and final closure. A sock method uses the existing tube as the body, reducing the amount of joining required. Completely no-sew construction works best for simple shapes and decorative projects rather than complex products with high-stress limbs, structured faces or heavy accessories.
What is the easiest fabric for a no-sew plushie?
Felt is usually the easiest starting material because it stays relatively stable during tracing and cutting, has a clear edge and does not stretch dramatically while being filled. Craft felt around 1-2 mm thick works well for many hand-sized decorative projects. Fleece and minky can feel softer, but they are more flexible and therefore harder to align cleanly with glue. Socks are another beginner-friendly option when the goal is a rounded animal rather than a flat graphic silhouette.
Is fabric glue better than hot glue for plushies?
Fabric glue is often the better choice when flexibility matters because many textile formulas remain softer after curing than a thick hot-glue bead. Hot glue is faster and works well for small felt crafts, but too much can create a hard ridge around the edge. The safest way to choose is to bond two scraps of the actual fabric, let the adhesive cure fully, then bend, squeeze and pull the sample gently. That small test reveals more than relying on the glue category alone.
How much stuffing should I put in a DIY plushie?
There is no universal weight because the correct amount depends on the size, fabric stretch, desired firmness and shape. Add loose fiberfill gradually and judge the silhouette rather than trying to pack the body completely full. Fill narrow areas first, then build the centre. If the fabric becomes shiny, distorted or difficult to close, remove some filling. A useful practical rule is to stop when the plush holds its shape but still compresses comfortably in your hand, then make a final adjustment before sealing the opening.
Can a no-sew plushie be washed?
Sometimes, but washability depends on the entire construction rather than the fabric alone. The adhesive, outer textile, decorative parts and filling all need to tolerate water, detergent, movement and drying. Unless the adhesive manufacturer specifically states that the cured bond is washable under your intended conditions, spot cleaning is the safer option. A decorative no-sew craft should not automatically be treated like a machine-washable commercial plush toy, even if the felt or sock material itself can normally be washed.
Can I turn my no-sew prototype into a manufactured plush product?
Yes. A no-sew prototype can be a useful early reference for overall size, colour, silhouette and basic character appeal. The commercial version will usually need additional development, including three-dimensional pattern engineering, material specification, decoration decisions, prototype revisions, an approved sample and controlled production information. If the design includes shaped facial features, limbs, clothing, accessories or repeated production requirements, a manufacturer can use the prototype as one input while rebuilding the construction around durability, character fidelity and repeatability rather than copying the glue-based method literally.